Hobbit House : Return to Middle Earth How to build (With videos) Part 3 of 4
PART 3 : Building the structure.

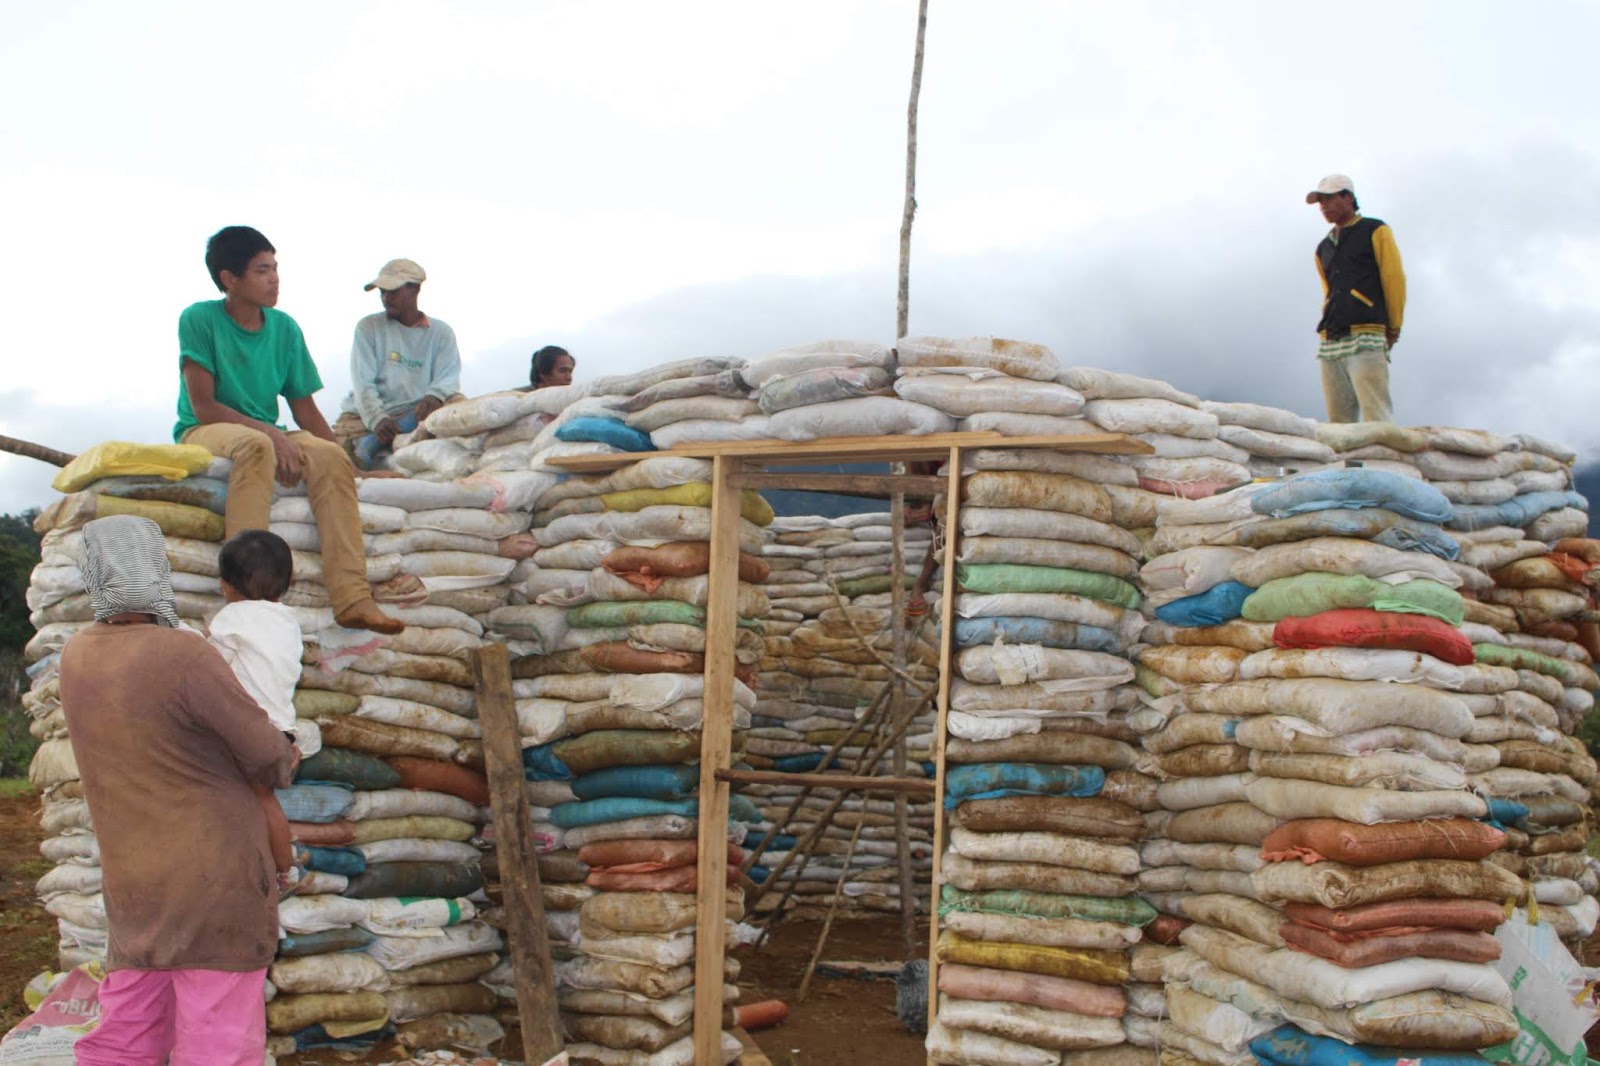
With the foundation laid out proper and the drainage and support walls rising .
As you can see the supports adjacent to the door frame on each side have came up.
This was merely to illustrate something we had gotten into in the last article, Let us not get too far ahead of ourselves.
We are now laying the bags staggered in a brick like row offset and with every other row barbed wire is ran in two linear circles to maintain stability of the bags themselves.
Also around this time you will want to be adding your pvc pipes in at the ground level to create ventilation or air intake.
How and how many you do is up to you but it is advisable if that is within the design you are wanting to make.
This is where the uniformity of the bags not only in size of the bag but the amount filled in each one comes into play.
In our case it was not possible so that meant that we had to go with the nipa roof option versus a full on dome as the non uniformity did not allow us to dome it out given uneven weight distribution.
The process itself is rather simple just use the tamp devices to flatten out your bags and make sure that you have tucked the open tops of the bags over so that would not be hanging out causing an issue.
Windows and doors :

So as you can see in the picture above basically we put a tire in where the frame of the window should go .
We do this so that it can hold the weight of the bags until the mixture dries, settles and hardens within the rough time frame of two weeks.
We put the wooden dowels in as well to hold the uniformity of the rows of bags at the top of the window setup.
As for the door frame we have our supports as you can see other than that it is pretty self explanatory.
Roofing :
As we had said earlier the dome is the ideal design but as we had a logistical limitation we went with the nipa roof as it was just what was practical for us.
Below is a picture of a proper dome (PICTURE IS NOT MINE AND IS PROPERTY OF THE OWNER.)

As you can see we set up a straight forward roofing canopy with some wood and threaded in some nipa and layered it to set up the roofing you see below again very simple and straight forward.
It is a pretty straight forward narrative once the foundation is laid out and set up and the math is done properly .
In part 4 we will discuss the finishing of the house itself and dive into different styles that people seem to like .


Comments
Post a Comment